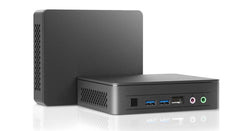
Setting up a privacy server for storing and managing your files independently of commercial cloud services involves several steps. Below is a step-by-step guide covering hardware, open-source software choices, storage capacity considerations, backup procedures, and the benefits of having a privacy server.
Step 1: Hardware Selection
Choose hardware based on your specific needs. Consider a server-grade machine or a dedicated NAS (Network Attached Storage) device. Key considerations include:
Processor: Multi-core processors for faster processing.
RAM: Sufficient RAM for smooth operations.
Storage: Multiple large-capacity hard drives or SSDs for data storage.
Network Connectivity: Gigabit Ethernet for fast data transfer.
Step 2: Install an Operating System
Choose a privacy-focused operating system, such as:
Linux Distributions: Debian, Ubuntu Server, or CentOS.
NAS Operating Systems: FreeNAS or OpenMediaVault.
Step 3: Set Up File Storage
Configure your storage solution using software like:
Nextcloud: A self-hosted file sync and share server.
OwnCloud: Similar to Nextcloud, offering file hosting and collaboration tools.
Step 4: File Migration
Move your files from cloud services to your privacy server using:
Rclone: A command-line program for syncing files and directories.
Nextcloud Desktop Client: Helps sync files between your computer and Nextcloud server.
Step 5: Communications and Collaboration
Select open-source software for communication and collaboration:
Matrix Synapse: A server for decentralized communication.
Riot/Element: A Matrix client for secure messaging.
Collabora Online: Integrates with Nextcloud for collaborative document editing.
Step 6: Privacy-Focused Email
Consider setting up your email server with:
Mail-in-a-Box: An easy-to-deploy mail server solution.
Step 7: Backup Procedures
Implement regular backups using:
Duplicity: Encrypted, bandwidth-efficient backup using the rsync algorithm.
Rsync: Efficient file-copying tool that can be used for backups.
Step 8: Security Measures
Enhance security with:
Let's Encrypt: For SSL/TLS certificates.
Fail2ban: Protects against unauthorized access by monitoring logs and banning malicious IP addresses.
Benefits of a Privacy Server:
Data Ownership: You have full control over your data, eliminating third-party access.
Increased Privacy: Your files are not subject to data mining or surveillance by commercial providers.
Customization: Tailor the server to your needs with specific software and security measures.
No Monthly Fees: Avoid subscription fees associated with cloud services.
Reduced Dependency: Independence from the reliability and policies of commercial providers.
Remember to stay updated with security patches, regularly backup your data, and consider the specific needs of your setup when making hardware and software choices.
Not financial or legal advice, for entertainment only, do your own homework. I hope you find this post useful as you chart your personal financial course and Build a Bitcoin Fortress in 2023.
Thanks for supporting my work. Always remember: freedom, health and positivity!
Please also check out my Bitcoin Fortress Podcast on YouTube here and on all your favorite streaming platforms. I do a weekly Bitcoin news update every week on current items of interest to the Bitcoin community, usually 30 to 60 minutes depending on the number of topics to cover. Please check it out if you haven’t already. Also now on Fountain, where you can earn Bitcoin just for listening to your favorite podcasts.
Follow me on Nostr:
npub122fpu8lwu2eu2zfmrymcfed9tfgeray5quj78jm6zavj78phnqdsu3v4h5
If you’re looking for more great Bitcoin signal, check out friend of the show Pleb Underground here.
Lightning tips appreciated here.


Great article. The days of trusting free email and file storage are over